Pages

Friday 11 September 2015

How to Redirect blogger Blog on Custom Domain or URL

Domain Name is an important part of any website.

Many time blogger needs to transfer their blog to own custom domain name so whenever blog opens it will be on the name of custom domain.


Following are easy steps for Redirect blog to Custom Domain.


  • Login to Blogger, select your blog and go to Settings.
  • In Basic tab, Click on +third-party URL for your blog under Publishing.


  • Enter domain name on which you want to redirect your blog.
  • Click on Save..
  • It will display message We have not been able to verify your authority to this domain. and display to CNAME variable values.
  • Now login to third party domain registrar and find DNS Zone file.
  • We have to enter two CNAME variable for domain authority as per following.
         (Name/Label/Host)                                              (Destination/Target/Points to)

     1)            www                                                                    ghs,google.com   

     2)                                        Unique alphanumeric value                                            

  • First CNAME variable is same for all blog. Second one is different unique alpha numeric value.
  • Save DNS zone file it will take upto 48 hours to make changes.

Congratulations now blog redirects to your custom domain name. 
                          

How to Generate and Submit Blogger Site Map to Google WebMaster Tool

Sitemaps are useful for Search engine to crawl content of any web site.

Submitting your site map to Google or any Search Engine is an very important for Organic Search Traffic.

The Sitemap are submitted in xml and is used for search engine and to crawl content easily.

If Sitemap of any website is submitted to Search Engine than it can easily Crawl it's content and give best result in SERP (Search Engine Result Page).

Following are easy steps for Submit Blogger Site Map to google Search Engine.


  • Login to Blogger Account.


  • Click on Add Property, Add your site and comfirm your site ownership.


  • Then goto web master tool site dashboard.


  • Click on Crawl tab and Click on Sitemaps.


  • Click on ADD/TEST Sitemap.


  • In URL Box Enter


/atom.xml?redirect=false&start-index=1&max-results=500


  • Click on Submit Sitemap Button.
  • Refresh your Page.


(Above sitemap submit first 500 post to search engine). For blogger more than 500 posts we have to submit multiple sitemaps as following.


/atom.xml?redirect=false&start-index=1&max-results=500 (1 to 500 Posts)

/atom.xml?redirect=false&start-index=501&max-results=500 (501 to 1000 Posts)...

Congratulations your site map has been submitted successfully.

It's recommended to divide sitemaps in 500 posts per sitemap.


Sunday 3 May 2015

Change Blogger Template Body Layout and Footer Layout

Easy Steps to Change Body Layout and Footer Layout of Blogger Template

Many Blogger wants to change Body Layout of blogger template.

On which sidebar Gadgets will be displayed. Left Sidebar, Right Sidebar or Both Side.

Footer Layout can also be changed one column, two column or three column.

Log in to blogger account

Click on Template.


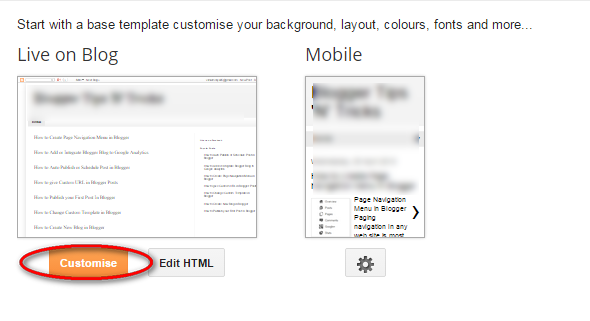
Click on Customize


Click on Layout


After changing layout we have to change or rearrange Gadgets of Blog.

How to change width of Entire Blog and Sidebar

Following are easy steps for Change Width of Entire Blog and width of Sidebar

Log in to Blogger account.

Click on Template.


Click on Customize Button


Click on Adjust Width


You can set width for entire blog, Right sidebar, Left Side bar as per your Blogger template

We can also see preview for template width as down side.


How to Change Blogger Background

Following are easy steps for Change Blogger Background

Log in to Blogger account

Click on Templates


Click on Customize Button

Click in Background


Select background image from list or you can also upload your own image.

If you want to set solid color as your blogger background.

Create and image with that color and upload it.....

Congratulations your blogger background changed !!!!

Wednesday 29 April 2015

How to Create Page Navigation Menu in Blogger

Page Navigation Menu in Blogger

Paging navigation in any web site is most important and required thing. Using page navigation visitor can easily visit different pages of website.

Many bloggers have questions about paging navigation in blogger.

Yes Paging navigation is possible in blogger using Lables or Blogger Pages.

First have to generate Label or Page for you want to give navigation.

Following are steps for paging navigation in blogger.

Login to Blogger Account.

Click on Layout Tab


Click on Edit Under Pages tab.


Now Click on Add External Link.


Page Title : Enter title for navigation.  Like about us, Contact us etc etc.

Web Address (URL) : Enter URL address for that navigation menu. It can be your Blogger Page or Label.

In URL field you have to enter Page Url or Label Url.


Click on Save Link.


Congratulations Your Page navigation menu is generated !!!!

Home page link is generated automatically by blogger.

Follow this steps for generate more navigation menu as per requirement.

Monday 27 April 2015

How to Add or Integrate Blogger Blog to Google Analytics

Steps to Integrate Blogger Blog to Google Analytics.

Google analytics is an important tool to analyze audience of any website or blog. Analytics is useful for daily Visitors, Pageviews etc etc..


Login to your google account and sign up for analytics.


Enter website details and category of website.


Click on Get Tracking ID

Your tracking code is generated.


Copy generated tracking code.

Now we have to enter that tracking code into blogger.

Login to Blogger and Click on Setting tab and in that Other tab.


Enter tracking code into Analytics Web Property ID and Click on Save Setting.

Congratulations your blog is now integrated with Analytics !!!